
ACBaltica developer Dominik Kuzmitskij shares how to synchronize directories between SAP Marketing and SAP CRM.
In this article, we will discuss a tool for synchronizing directories. During a project, we had to integrate Marketing and CRM systems. We faced several problems:
- there were a lot of directories;
- it is hard to keep them organized in the Marketing system;
- synchronizing directories manually is tough and time-consuming;
- new records that appear in one system might not be updated in another.
To skip these difficulties and simplify synchronizing, we developed our tool. Also, we added a function that automatically updates all directories as a background job. It allows us not to bother confirmed synchronicity every time.
The program interface (Figure 1) includes the following components:
1) Tree − contains all the directories in the system;
2) Selection parameters area − displays the selected directory;
3) Bookmark − contains two Grid components, one with the directory settings and the one with the directory itself.
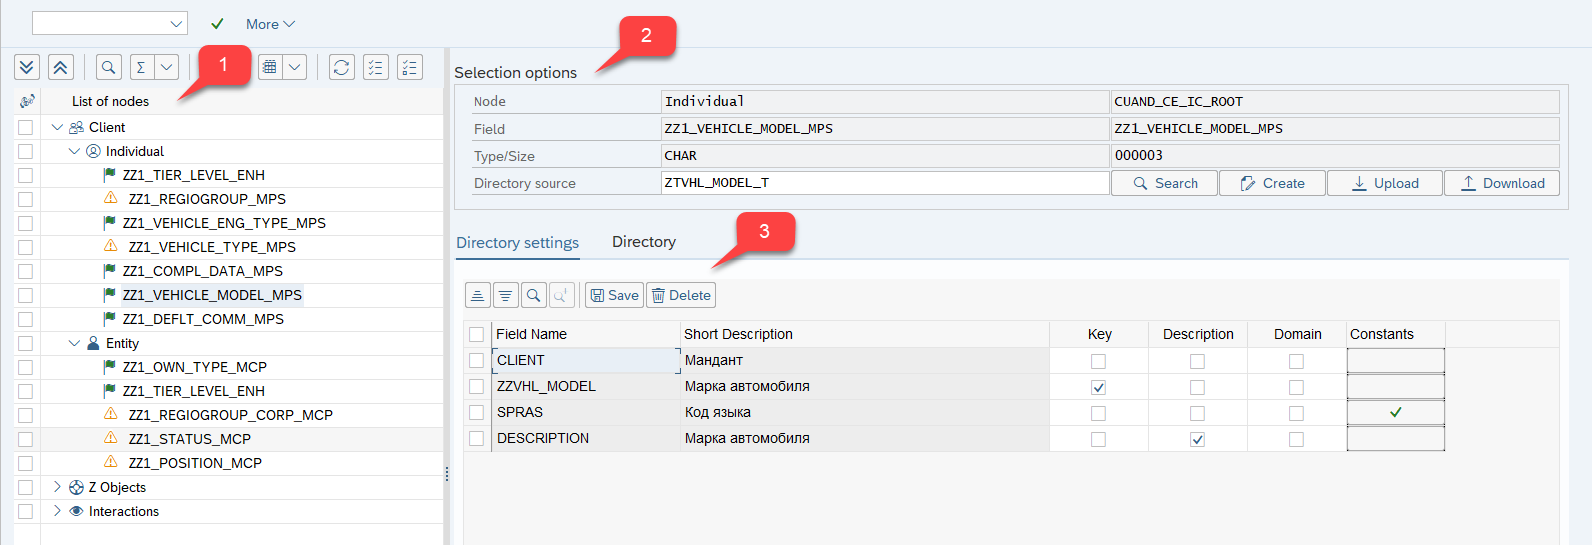 Figure 1. Program interface
In the left panel, we select a directory that needs to be synchronized or updated. For example, let’s click the "Individual" node and select the "Car brand" directory. Double click to select the directory. After this operation, we see our selected directory in the selection parameters area (Figure 2).
 Figure 2. Selected directory
It shows the node information, the name of the directory, its technical name, type, and dimension. Also in the following area, we can choose one of 4 buttons that perform different actions (Figure 3):
1) Search;
2) Create;
3) Download;
4) Upload.
 Figure 3. Selection parameters area
Let's examine the functions of each button.
1) The "Search" button
This button is used to search for a directory in CRM. When we transfer it into the Marketing system, we synchronize the directory. To find a reference in the CRM system, we need to indicate the source of the reference (table in the CRM system). Then click the "Search" button (Figure 4).

Figure 4. Selection parameters area
Enter the table name “ZTVHL_MODEL_T” in the directory source field. It will open the directory settings tab if the directory is found in the CRM system (Figure 5).
 Figure 5. Directory settings tab
In this tab, we can customize the directory. Here we see a grid with the following columns:
1) Field name – contains all fields of the specified data source;
2) Short description – comprises a short description of the fields;
3) Key in the form of a checkbox – allows to set key fields;
4) Description in the form of a checkbox – allows to select a field that is a description;
5) Domain in the form of a checkbox – enables to specify that the values of the directory will be received from domain;
6) Constants – allows setting constant values for the lookup. For example, they can indicate that we only need values in English or English and Russian.
Let's configure the directory. We synchronize a directory called “Car Make”. Thus, let’s mark ZZVHL_MODEL “Car Make” field as a key field. We also tick the field DESCRIPTION in the "Description" column (Figure 6).
 Figure 6. Setting up the directory
We can also set constants. For example, if we want to receive a directory only in English and Russian, we set the SPRAS field to a constant value. Click the button in the "Constants" column. We have a modal window with two tabs: select a separate value or select intervals (Figure 7).
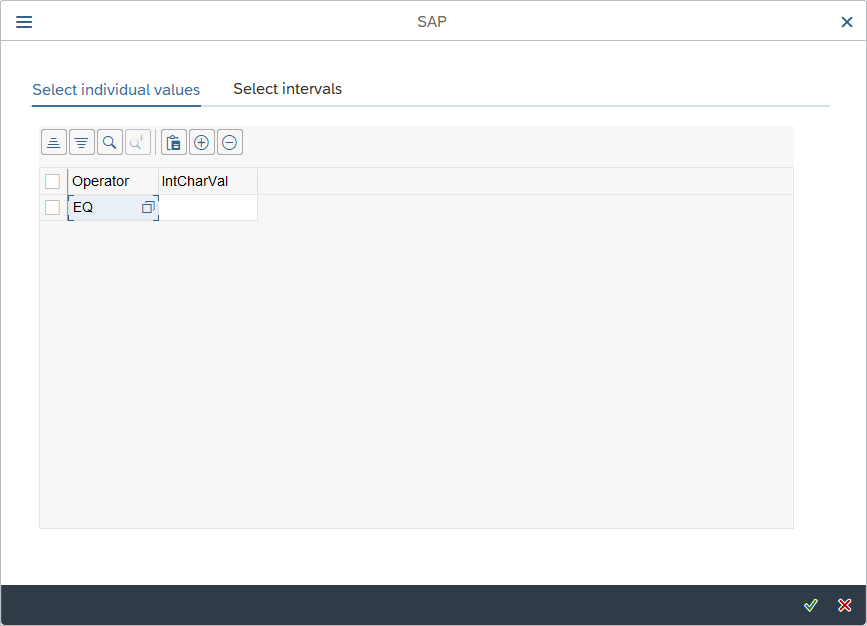
Figure 7. The modal window for entering constants
Let’s set separate values. We have a search engine binding. So, we get the value of the fields from the CRM using an RFC call. Let's choose the values EN and RU (Figure 8).
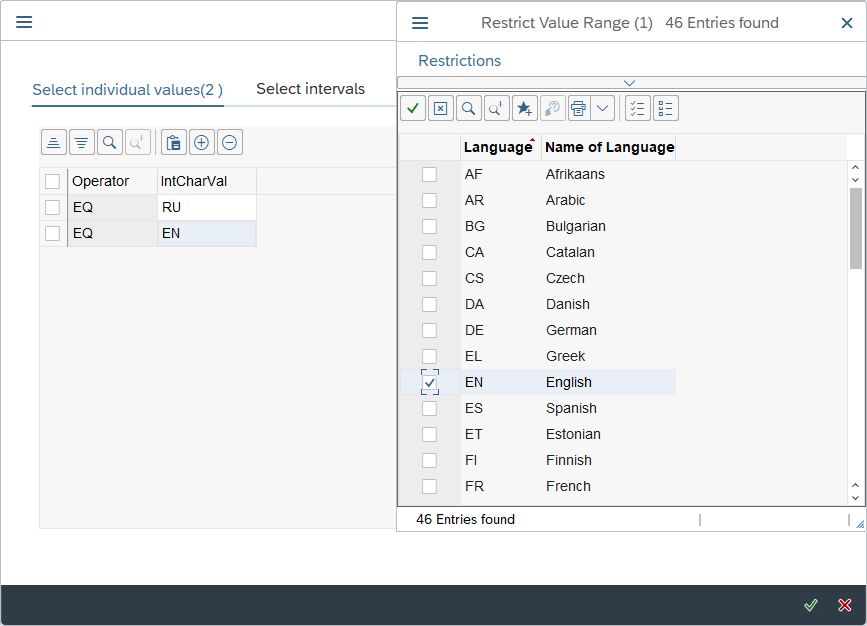
Figure 8. Selecting constants
To save the directory setting, click the "Save" button. We receive a message that this setting is saved (Figure 9).
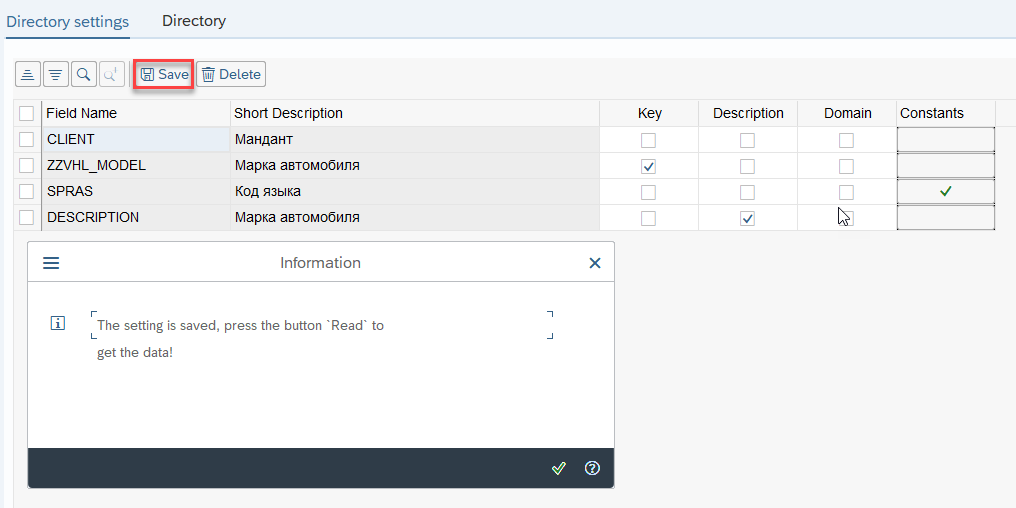 Figure 9. Saving a directory setting
To get a directory from CRM, we need to click the "Read" button in the "Directory" tab. Here there is already some data in the directory (Figure 10).
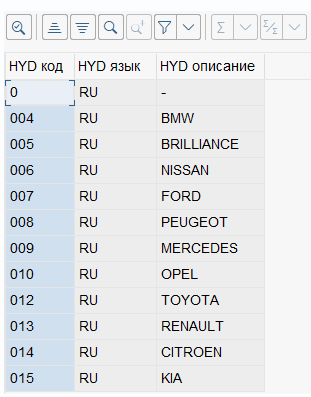
Figure 10. Directory
Now we need to synchronize the directory with another one from CRM. To get entries from CRM, click the "Read" button. Then we receive directory data from another system (Figure 11).
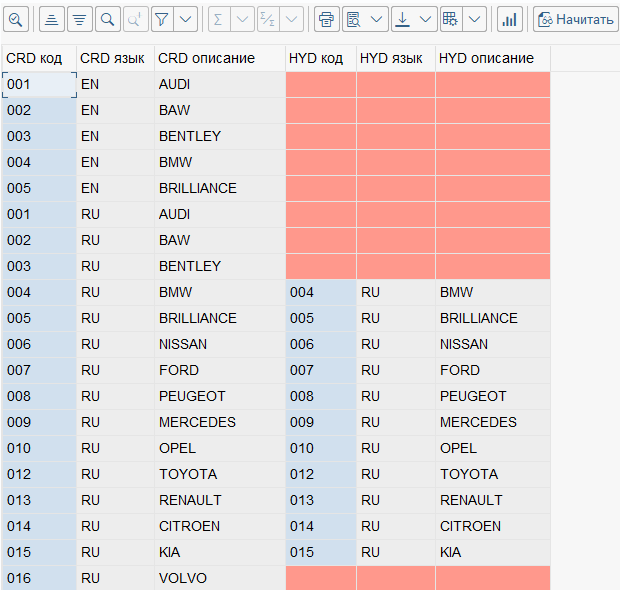
Figure 11. Directory synchronization
As you can see, there are not enough entries in our directory in the Marketing. Here we have 2 options:
- to select specific records from the CRM system and copy them to the Marketing;
- to select all records at once and copy the entire directory;
We can change the directory manually, if we need to modify or add entities.
Select all directory entries and copy them to the Marketing. We will get the following result (Figure 12).
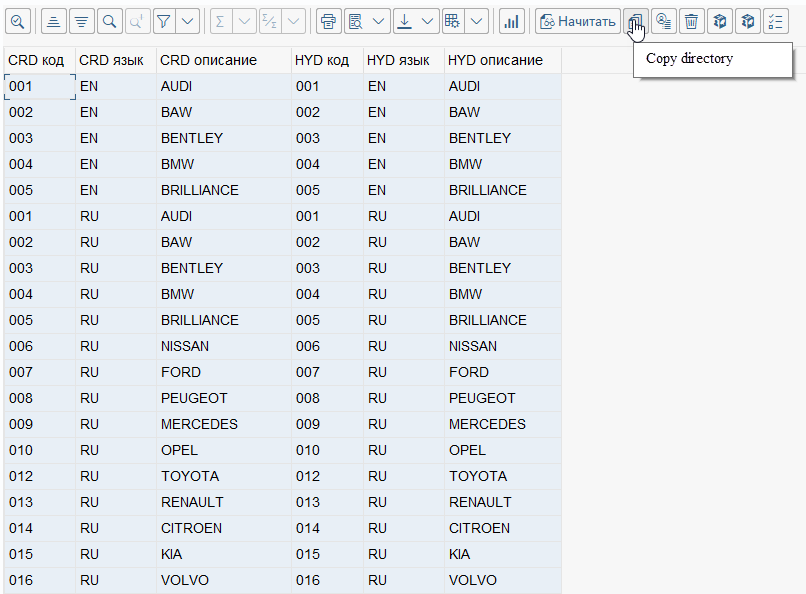
Figure 12. Synchronization of the CRM directory - the Marketing
2) The "Create" button
It allows us to create a directory manually. If we need to enter the value of the directory, we can click the "Create" button. To do this, we select the directory and click the "Create" button (Figure 13).
 Figure 13. Creating a directory
A tab of the directory opens. To fill data in the directory, click the “Manual entry of values” button (Figure 14).

Figure 14. Manual entry of values
We have a modal window to enter records. Let's add some entries to the directory (Figure 15).
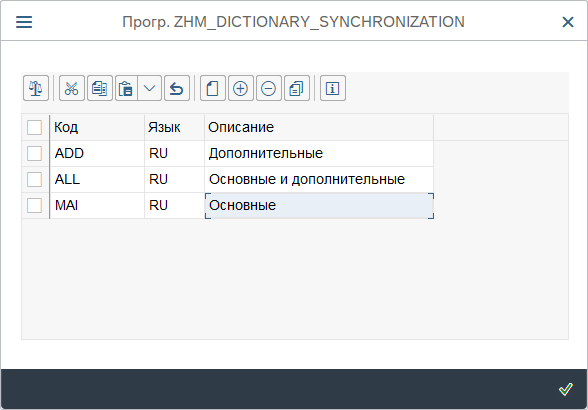
Figure 15. Entering values for the directory
Click the "OK" button. Thus, we have created entries in our directory (Figure 16):
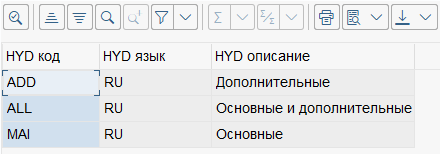
Figure 16. Result of manual entry of values
3) The "Upload" button
By clicking this button, we upload the directory from the Excel spreadsheet. For example, let's upload a directory called “Desired communication method”. In the selection parameters, we can see that the directory data type is CHAR, and its size is 3 (Figure 17).

Figure 17. Parameters for selecting a directory
Let's prepare an Excel spreadsheet for loading and take into account the data type CHAR and size 3 (Figure 18).
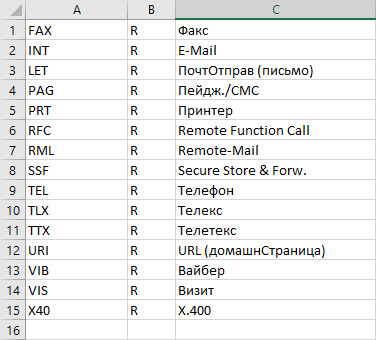
Figure 18. Excel spreadsheet for download
Let's save this file in .CSV format. To upload the table in the program, click the “Upload” button. We will see a modal window for selecting the file to upload (Figure 19).
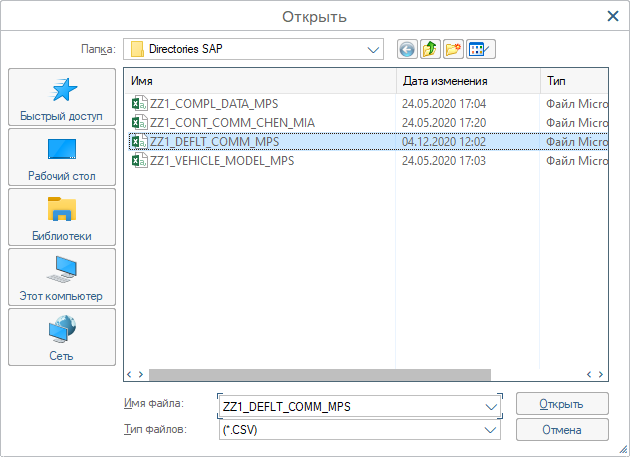
Figure 19. The modal window for selecting the file to upload
Select the file that contains our table. After that, a modal window appears with a request to copy all records from the file or copy records selectively (Figure 20).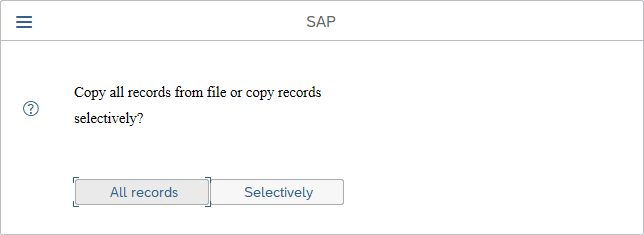
Figure 20. Modal window
Select “All records” to copy all records from the file. We will get the following result (Figure 21):
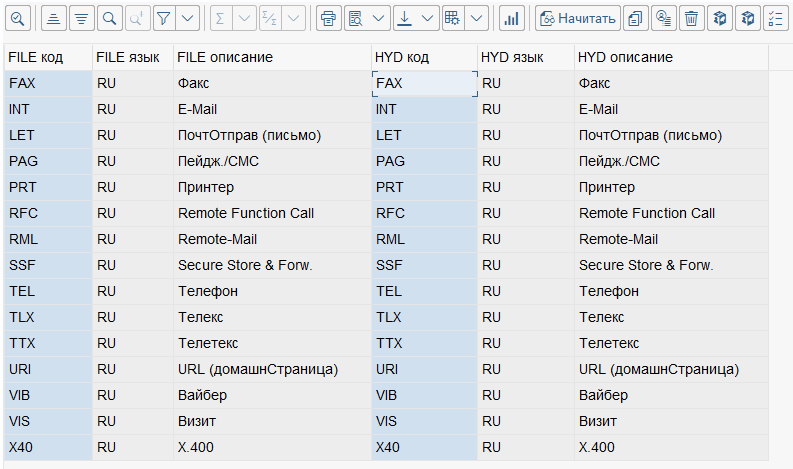
Figure 21. Result of loading a directory from a file
The data from our file is on the left side, the copied data is on the right side.
4) The "Download" button
We can download our directory from the system to an Excel table by clicking this button. To download the directory, select the directory and click the "Download" button.
If we need to download a directory for an object, we need to click the node called “Z Objects” and select the directory that we want to download (Figure 22).
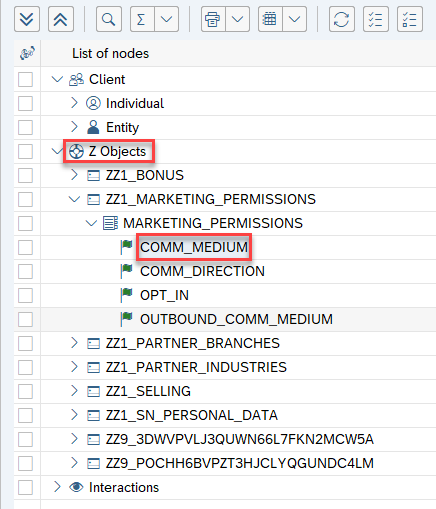
Figure 22. Selecting a directory for downloading from the system
We will be downloading the "Communication Tool" guide. This directory contains 81 entries (Figure 23)
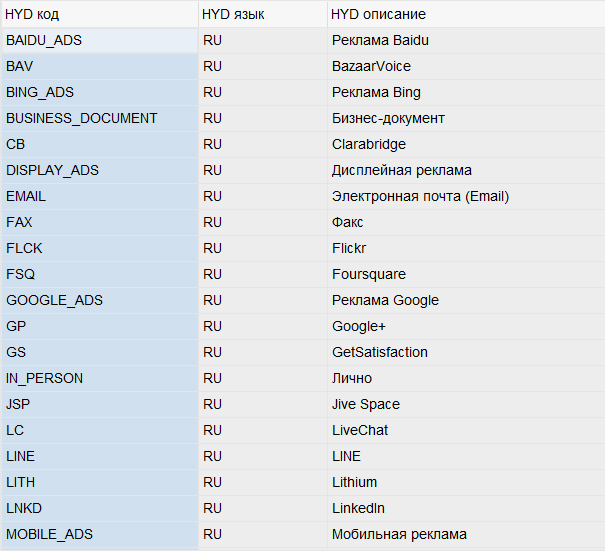
Figure 23. Part of the directory entries
To download the directory, click the "Download" button. After that, we receive a message that the directory has been downloaded (Figure 24).
![]()
Figure 24. Message about downloading the directory
If we open this file, we get the following result (Figure 25):
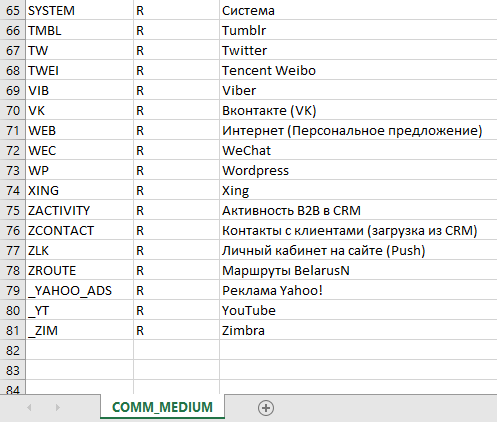
Figure 25. Result of downloading the directory from the system
Thus, we have completely downloaded our directory into an Excel table. In the future, we can change this file or upload it to another system.
Functionality for writing data to a request
Directories are stored in 4 tables:
1) Z table with codes;
2) Z table with codes’ descriptions;
3) SAP table with codes;
4) SAP table with codes’ descriptions.
In order not to reload the directories in each system, we have implemented functionality for creating requests. All selected values are recorded to the request to be carried to other systems.
To implement this functionality, we created 3 additional buttons that allow us to record data to the request:
1) "Write to request" – selected records will be recorded to the request;
2) "Add all records" – fills in all the records of all the fields that are in the report;
3) "Add selectively" – it submits selectively. You can select several branches in the tree and record them into the request.
Let's consider recording to a request. Open the directory, select 4 records and click the button "Write to request" (Figure 26).
After that, we will receive a message that the request has been created. If we call transaction SE01 and look at our requests, we will see our newly created request (Figure 27).
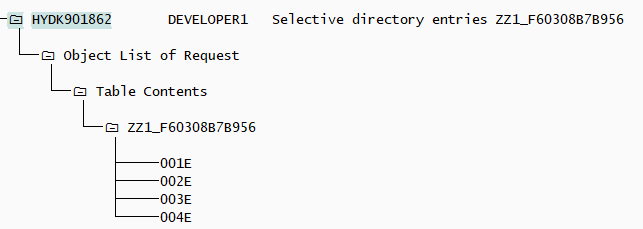
Figure 27. Created request
As we can see, our request includes one object. It is the contents of the table. If we open the request and the table that it contains, we will see our 4 records (Figure 28).
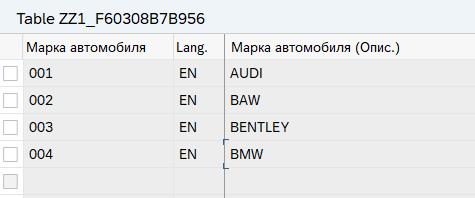
Figure 28. Content of the request
If we need to enter a directory or several directories into the request as a whole, then we need to use a button, that allows us to record entries in the request selectively. We can select several branches in the tree and record them to the request.
As an example, let us select two directories “Data availability”, “Desired communication method” and record them into the request. To record these directories into the request, click the "Add selectively" button (Figure 29).
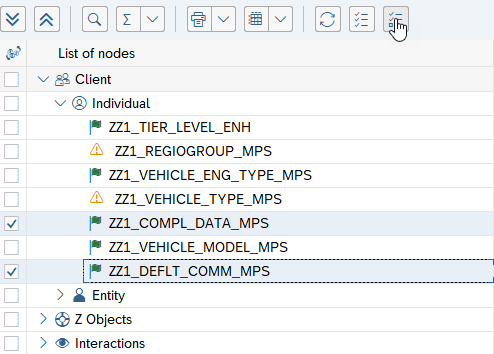
Figure 29. Writing several directories to a request
As a result, we receive a message that the request has been created. If we call transaction SE01 and look at our request, it looks like this (Figure 30):
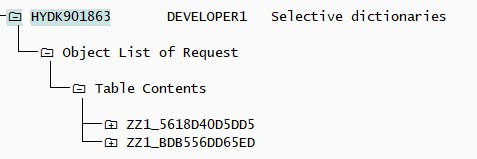
Figure 30. Created request
We see that 2 tables have been recorded to our request.
Conclusion
This tool allows to conveniently enter the directories in the system and quickly synchronize large directories between systems. The function of loading and downloading directories allows us to store directories not only in the system, but also on the computer itself. This tool also automatically updates all directories as a background job. That simplifies the process of synchronizing directories and allows you not to bother checking synchronization every time.

